Step 4 - Create Some Annotations
To view or edit annotations, you need to open a corpus and then open a document in the Corpus.
- Go to your Corpuses page and click on the corpus you just created:
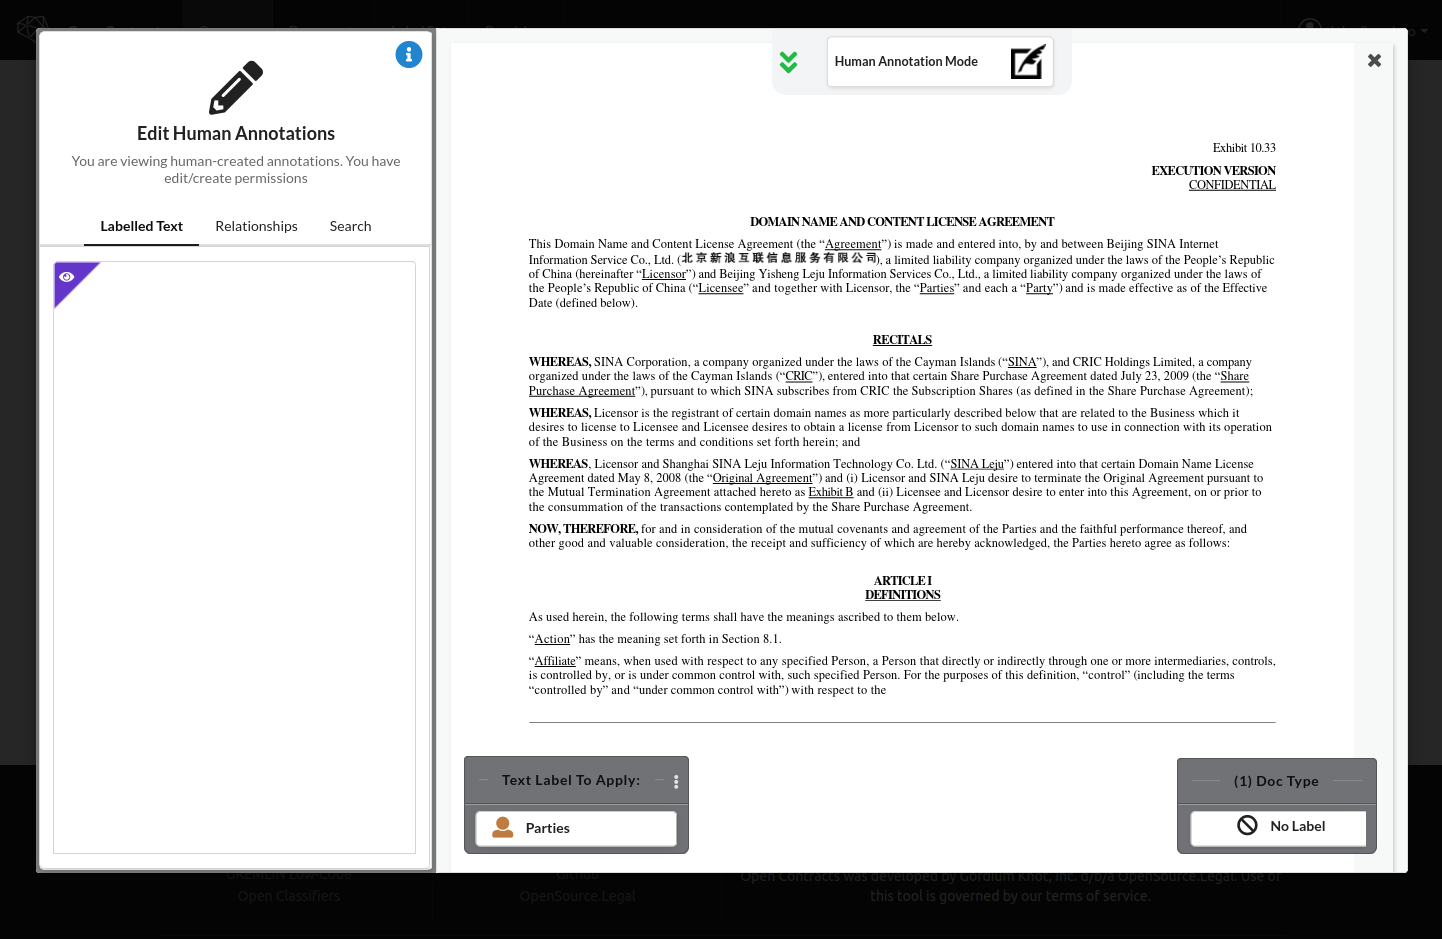
- This will open up the document view again. Click on one of the documents to bring up the annotator:
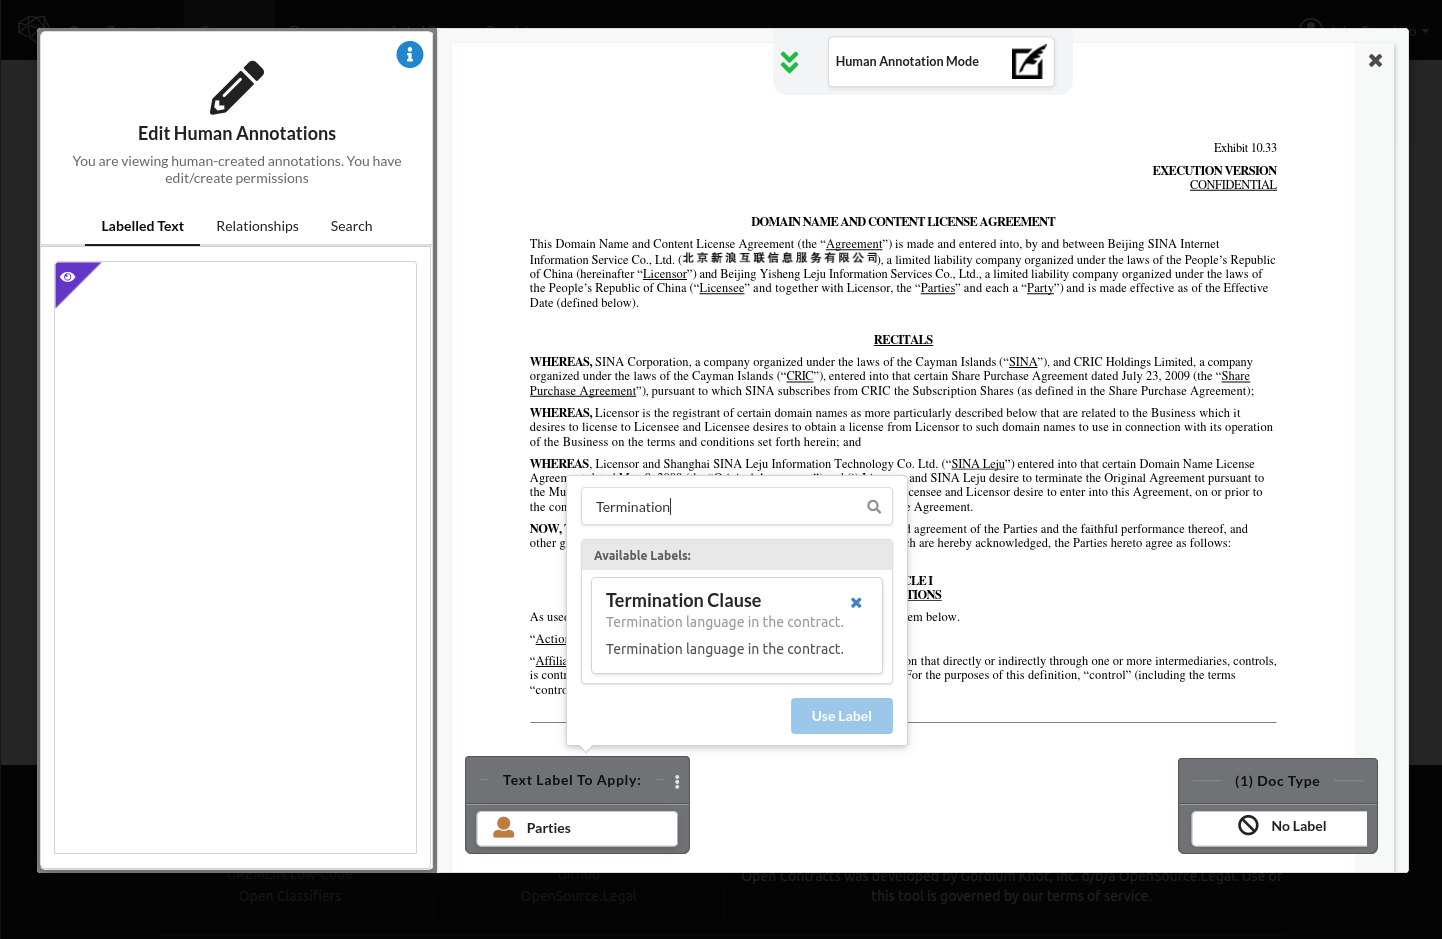
- To select the label to apply, Click the vertical ellipses in the "Text Label to Apply Widget". This will bring up an interface that lets you search your labelset and select a label:
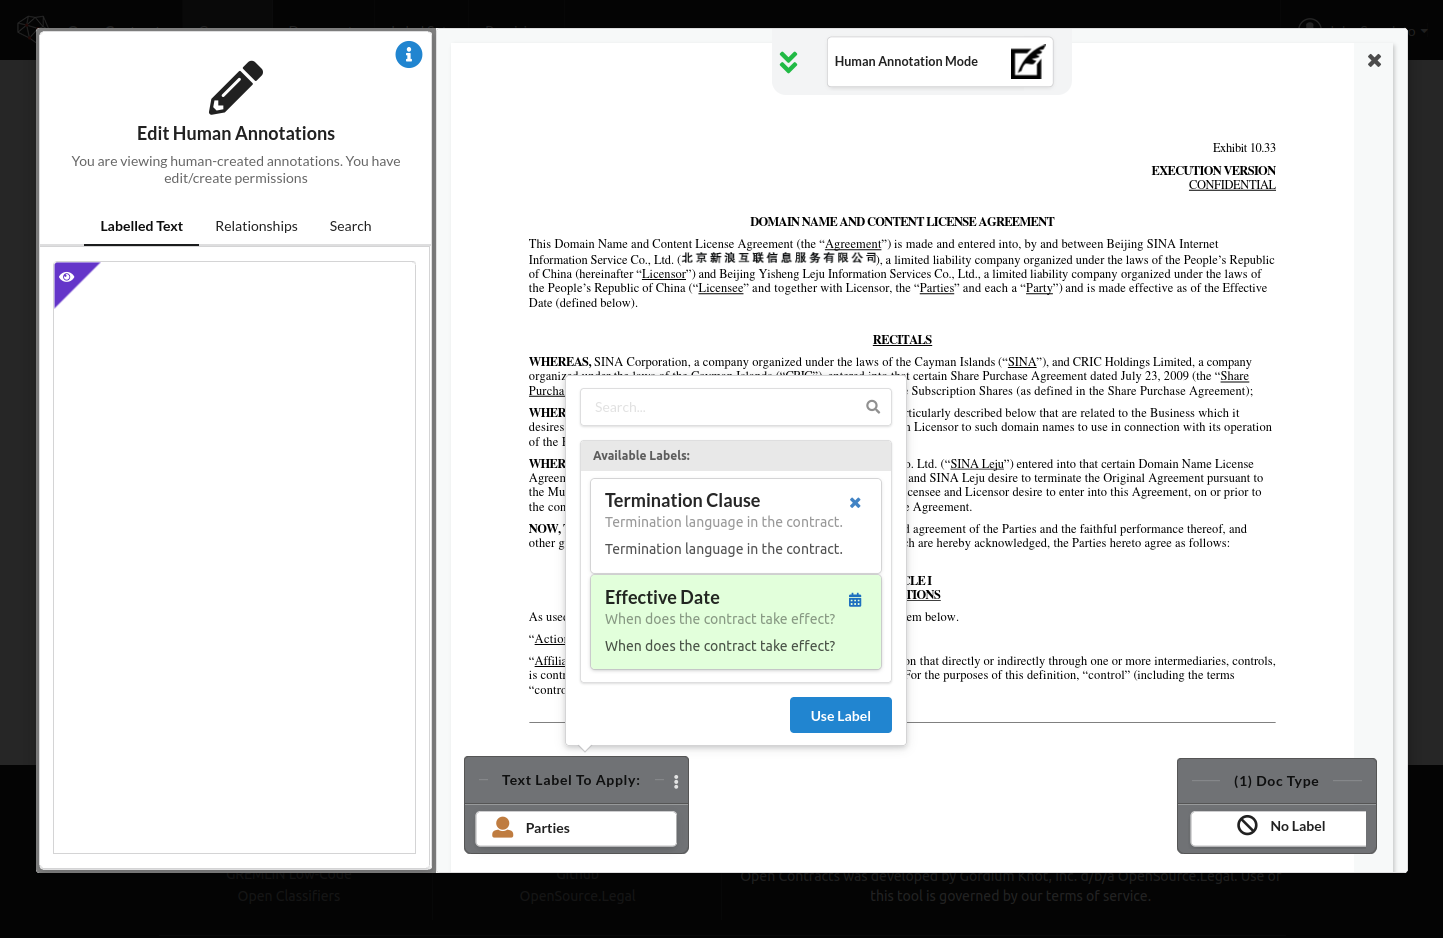
- Select the "Effective Date" label, for example, to label the Effective Date:
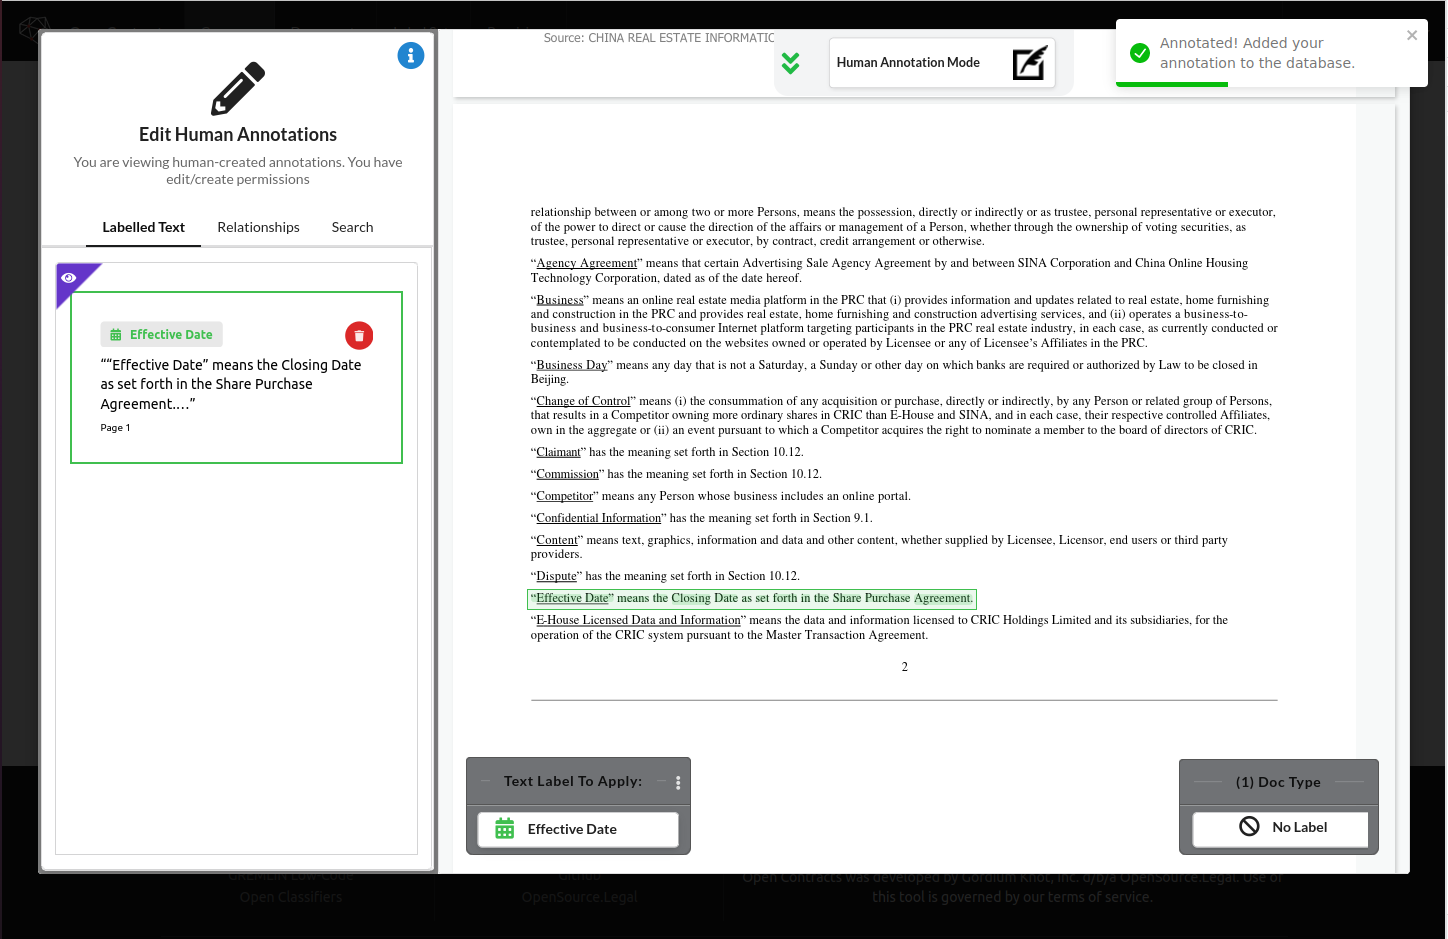
- Now, in the document, click and drag a box around the language that corresponds to your select label:

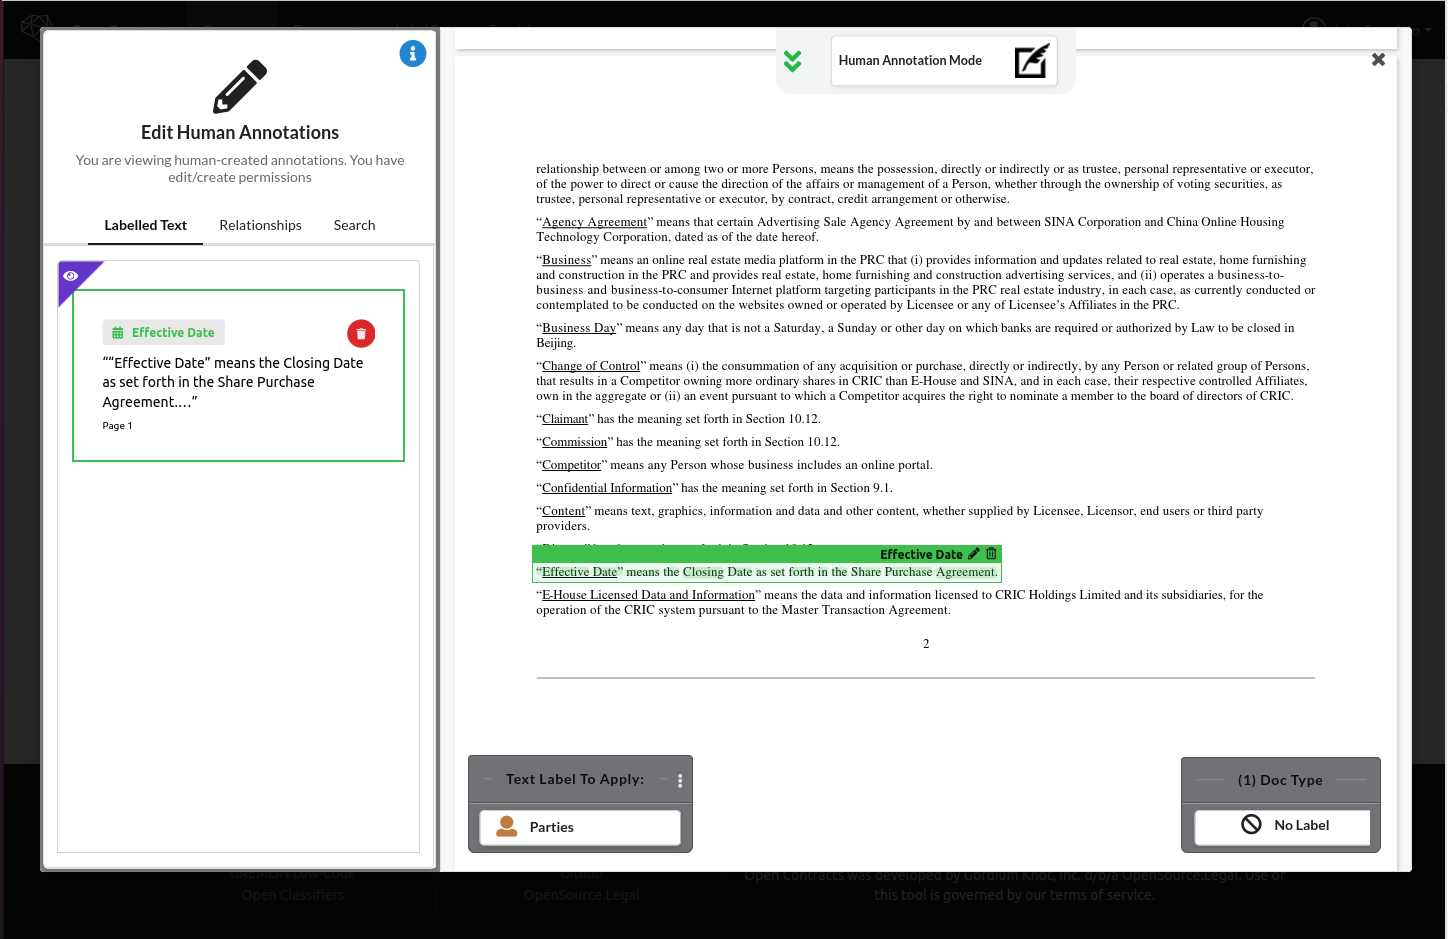
- When you've selected the correct text, release the mouse. You'll see a confirmtion when your annotation is created (you'll also see the annotation in the sidebar to the left):
- If you want to delete the annotation, you can click on the trash icon in the corresponding annotation card in the sidebar, or, when you hover over the annotation on the page, you'll see a trash icon in the label bar of the annotation. You can click this to delete the annotation too.
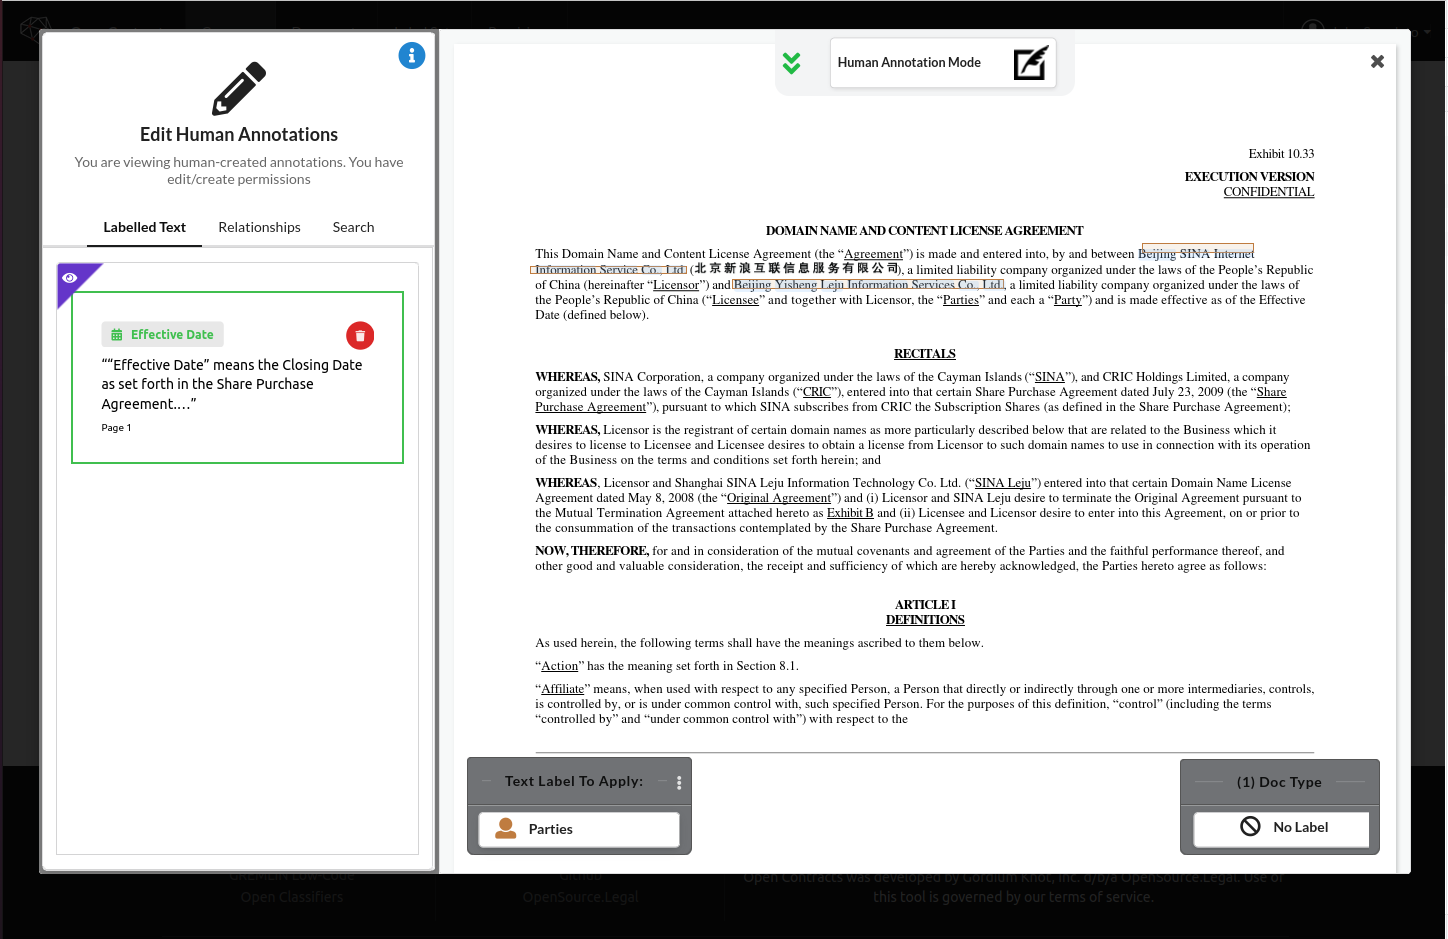
- If your desired annotated text is non-contiguous, you can hold down the SHIFT key while selecting blocks of text to combine them into a single annotation. While holding SHIFT, releasing the mouse will not create the annotation in the database, it will just allow you to move to a new area.
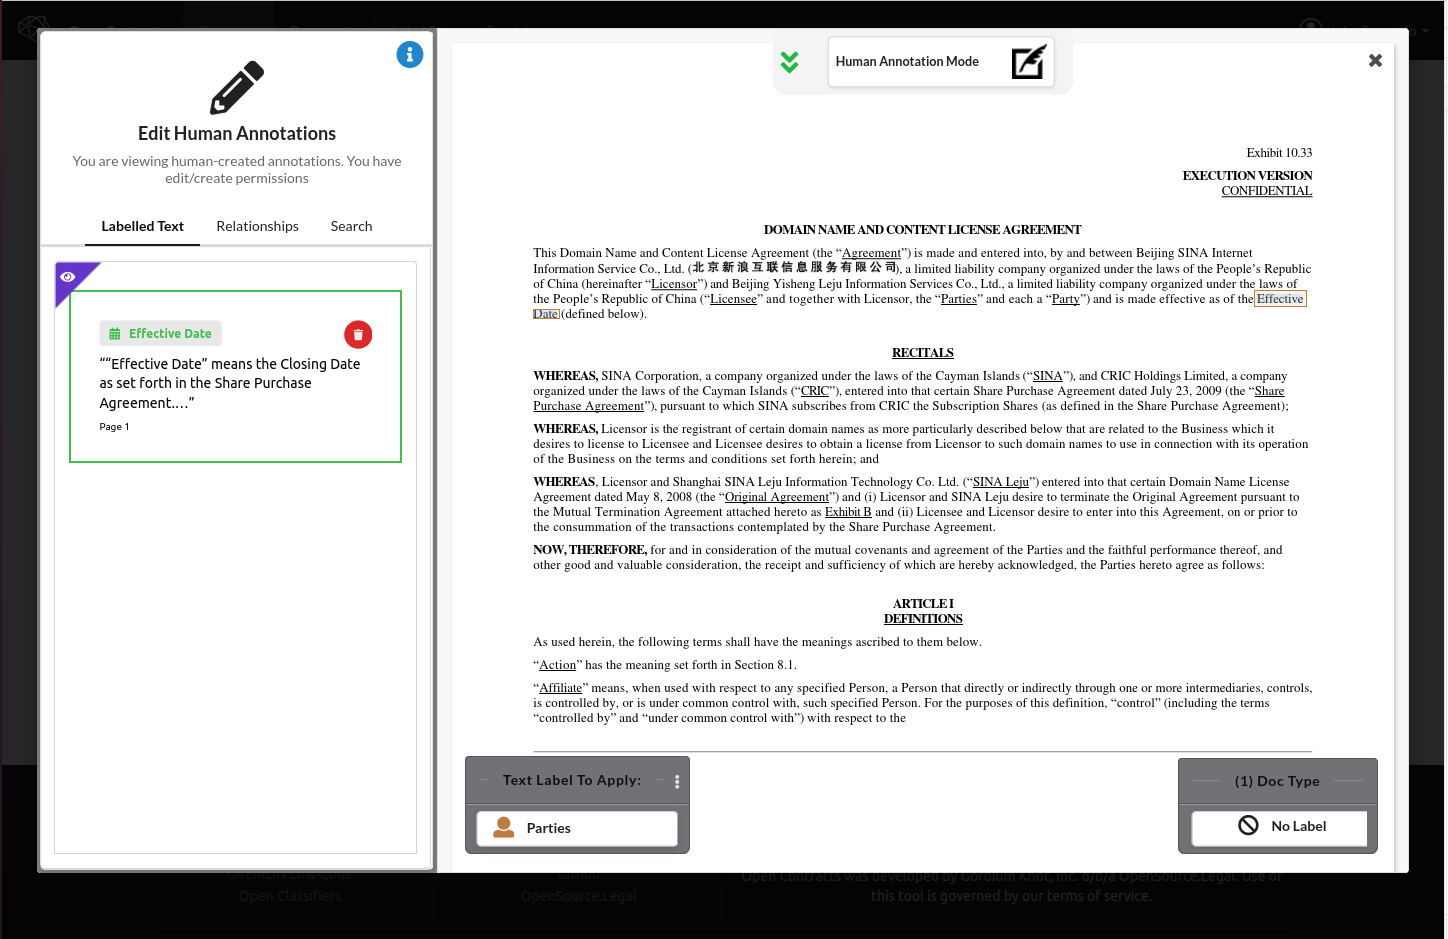
- One situation you might want to do this is where what you want to highlight is on different lines but is just a small part of the surrounding paragraph (such as this example, where Effective Date spans two lines):
- Or you might want to select multiple snippets of text in a larger block of text, such as where you have multiple parties you want to combine into a single annotation:
- One situation you might want to do this is where what you want to highlight is on different lines but is just a small part of the surrounding paragraph (such as this example, where Effective Date spans two lines):
Last update: October 24, 2022